Shower Niche Ideas: The Small Detail That Makes Your Bathroom Look Expensive
A shower niche is one of those details that separates a bathroom that feels custom from one that feels builder-grade. It's a recessed shelf built into the shower wall that holds your shampoo and soap — no caddy, no awkward corner rack, just a clean inset that looks like it was always supposed to be there. Done right, it costs a fraction of what a tile upgrade runs and has an outsized impact on how your whole bathroom reads.
Whether you're building new, remodeling, or just researching what your contractor is proposing, here's what you need to know to make decisions you won't regret.
Standard Shower Niche Size: 12x24 or 12x36 Inches
The most common shower niche dimensions are 12 inches wide by 24 inches tall, or 12 inches wide by 36 inches tall. These aren't arbitrary — they're designed to align with standard stud spacing (typically 14.5 inches of space between 16-inch on-center studs after accounting for the framing). A niche between studs avoids cutting through structural members and the complicated framing work that comes with it.
For tile sizing, standard niches work well with 12x12, 12x24, or 4x12 tile formats. If you're doing a 12x36 niche, you can fit three horizontal rows of 12x12 tiles inside — which makes the math simple and cuts minimal. The interior depth of a niche is typically 3.5 inches, which is the depth of a standard wall stud. That's enough to hold shampoo bottles and soap comfortably without things tipping forward.
If you want a wider niche — say 24 inches wide — your contractor will need to add blocking or a header between studs, which is doable but adds cost and complexity. For most bathrooms, the single 12-wide niche hits the sweet spot between practical storage and clean design.

Tile Inside the Niche: Accent Tile vs Matching, and Why Penny Tile Is Trending
The tile choice inside your niche is where you make it look intentional or expensive. You have two main approaches: match the surrounding wall tile exactly, or use an accent tile that creates a visual pop.
Matching tile is the safe, timeless choice. The niche reads as part of the wall, defined by its shadow rather than color contrast. It works especially well in monochromatic showers (all white, all gray, all large-format stone-look).
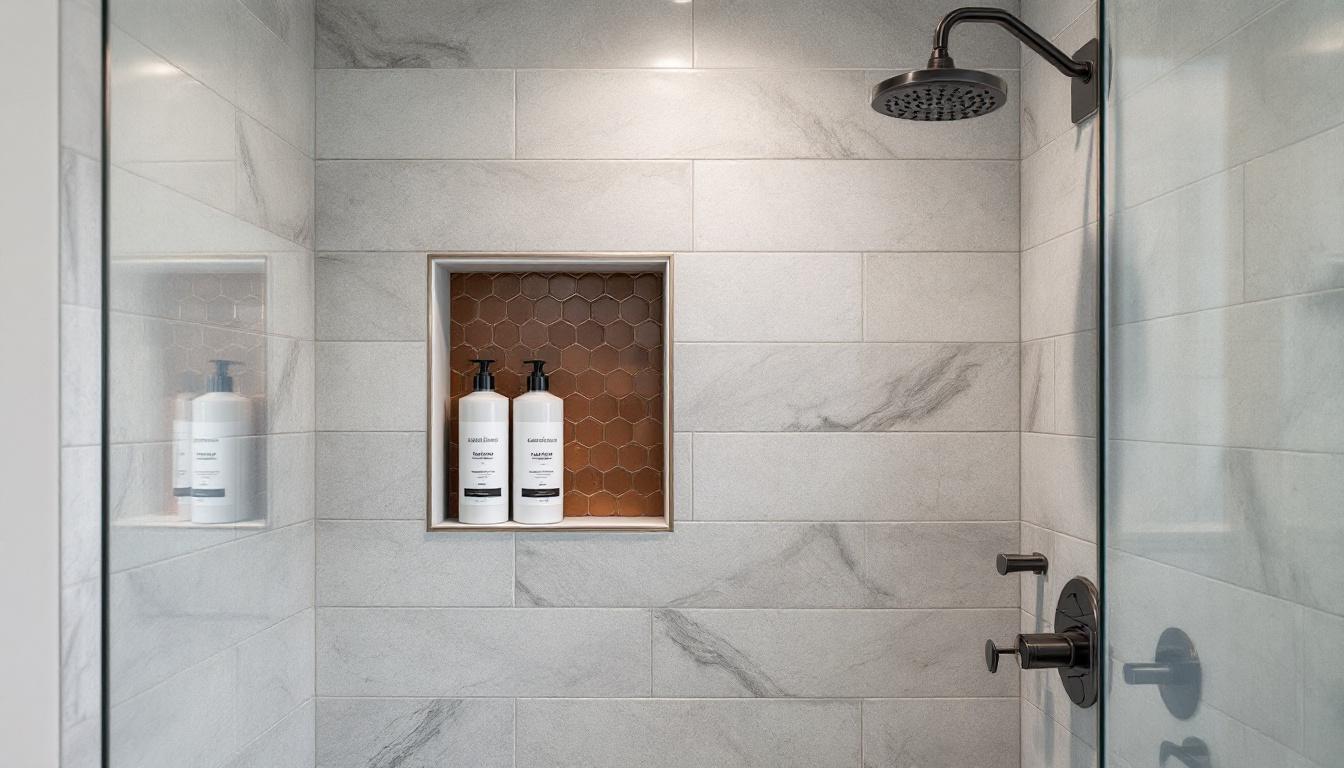
Accent tile inside the niche is more dramatic and currently trending in 2026. The most popular choices: penny tile (small circular tiles on a mesh sheet, usually marble or ceramic), zellige tile (handmade Moroccan tile with irregular surface that catches light beautifully), and fluted or bouclé-textured tile. Penny tile in particular is having a major moment — the texture contrast against flat large-format surrounds looks custom without being expensive. Mesh-mounted penny tile sheets run $8-18 per square foot.
One thing to plan for: the grout lines inside a niche get scrutinized more than anywhere else in the shower because the niche is at eye level and lit well. Use unsanded grout for joints under 1/8 inch, choose a grout color intentionally (matching tile vs contrasting), and seal it properly — niches collect standing water and soap residue.

Niche Placement: 48-60 Inches From the Floor and Away From the Showerhead
Height is the most commonly mishandled decision in niche placement. The standard recommendation is 48-60 inches from the finished floor, measured to the bottom of the niche. This puts the shelf at a comfortable reach-in height for most adults — you're not bending down or stretching up. If you're shorter or taller, adjust by 4-6 inches accordingly.
Wall placement matters just as much as height. Never install a niche on an exterior wall — exterior walls require insulation and vapor barriers that make niche installation complicated, and you can create a moisture problem if not done exactly right. Interior partition walls are the target.
The other key placement rule: keep the niche away from the showerhead wall. Niche shelves collect standing water, and placing the niche directly in the spray path means your products are constantly getting blasted and the niche gets extra moisture exposure. The side wall opposite or perpendicular to the showerhead is almost always the right choice.

Horizontal vs Vertical Orientation: Which One to Choose
A vertical niche (taller than wide, like 12x36) creates a portrait orientation that draws the eye upward and makes the shower feel taller. It's the more elegant of the two options and works especially well in showers with high ceilings or floor-to-ceiling tile.
A horizontal niche (wider than tall, like 24x12) feels more modern and pairs well with contemporary large-format tile and linear drain showers. It also tends to hold more items because the opening is wider — easier to reach in and grab things side by side.
If your shower wall runs between two studs that are 16 inches apart on center, a single vertical niche fits naturally. A horizontal niche spanning two stud bays (roughly 32 inches wide) requires a header — plan for it in framing rather than cutting it in later.
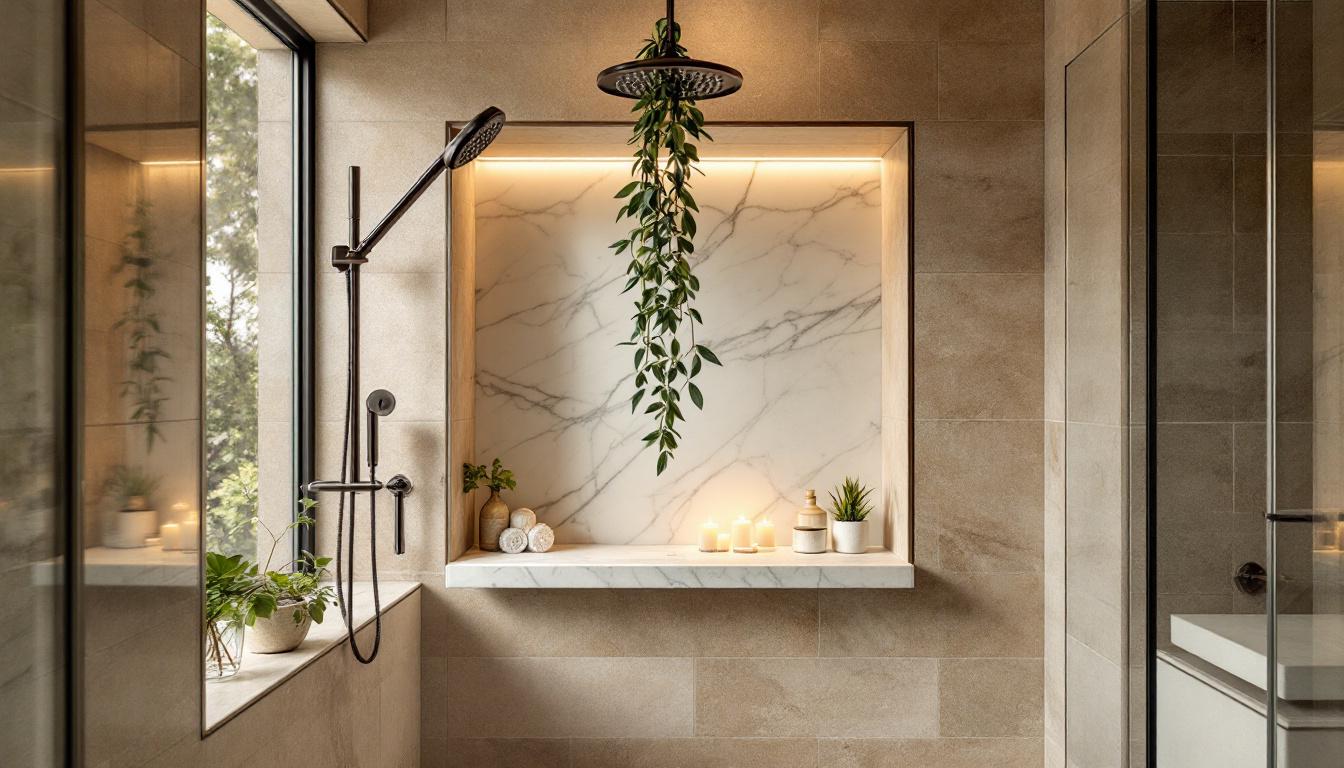
Niche Lighting: LED Strip Lights for $20-40
Adding an LED strip light inside the niche is the upgrade that gets the most reaction from guests. Waterproof LED strips (rated IP67 or higher) mounted along the top inside edge of the niche cast a warm glow across your products and create a visual depth that makes the whole shower feel considered.
Budget: $20-40 for the strip itself, plus the cost of running low-voltage wire through the wall to a driver/transformer outside the shower. This is typically a 2-3 hour job for an electrician. Use 2700K-3000K warm white for a spa feel. Cool white in a shower niche reads clinical rather than relaxing.
If running new wire isn't feasible, some battery-operated waterproof LED puck lights can be mounted inside the niche — but battery life is limited and you'll need to access them regularly. The hardwired option is almost always worth the extra cost if you're already opening the wall for the niche.
Niche Shelf Materials: Marble Ledge vs Quartz vs Tile
A niche with a single shelf dividing it into two compartments is more functional than one open cavity. The shelf material is a small detail that punches above its weight visually.
Marble pencil liner or ledge shelf: the classic choice, typically $50-100 for one shelf depending on size and marble type. White Carrara marble is the most common. It looks expensive, requires sealing once a year, and can stain from certain hair products if not sealed.
Quartz shelf: $40-80, more durable than marble, doesn't require sealing, comes in colors that coordinate with quartz countertops if you're matching the bathroom as a whole. A good practical choice.
Tile shelf: matching or contrasting tile cut to shelf width and bullnosed on the front edge. The most affordable option ($15-30) and looks cohesive if done with a clean bullnose or schluter strip edge. Avoid plain cut tile edges that aren't finished — they look unpolished.
Multiple Niches vs One Large: What Works Better
Two smaller niches (12x12 or 12x16 each) stacked vertically is a popular alternative to one tall niche. The upper niche for items you reach for during the shower (shampoo, conditioner, body wash), the lower niche for items used less often or to keep razors organized. Stacked niches look deliberate and architectural.
In a two-person household, two separate niches on opposite walls — one for each person's products — is increasingly popular. It eliminates the shared shelf shuffle and keeps the shower tidier.
One large niche (12x36 or larger) is simpler to frame and tile but can look heavy if the proportions aren't right for the shower size. In a small 36x36 inch shower stall, a large niche can overwhelm the wall. In a walk-in shower with 60+ inches of linear wall space, it reads better.
Common Shower Niche Mistakes (and How to Avoid Them)
Too small: a 12x12 niche holds about four small bottles. Most people have more products than that. Err on the side of larger — you can always leave a shelf partially empty, but you can't un-tile a niche that's too small without a demo.
Wrong height: too low means bending to grab things; too high means you can't see into the back of the niche. Get someone of the household's actual height to simulate reaching into the niche location before framing is closed.
No slope for drainage: the bottom of the niche should slope very slightly (1/8 inch per foot minimum) toward the shower to allow water to drain rather than pool. Pooling water causes soap scum buildup and eventually mold. Any competent tile setter knows this, but worth confirming explicitly.
On an exterior wall: as mentioned, exterior walls have insulation and vapor barriers that complicate niche installation and can lead to moisture problems inside the wall cavity. Interior walls only.
Frequently Asked Questions
How much does a shower niche cost to install? In a new construction or active remodel, adding a basic tiled niche runs $200-500 in labor. If you're cutting a niche into an existing tiled shower, expect $500-1,200 due to demo, waterproofing, and tile matching costs.
Can I add a shower niche without a full remodel? Yes, if you're willing to cut into the existing tile and wall substrate. It's a messy job and matching existing tile is often impossible, so most people who add a niche to an existing shower end up retiling at least the affected wall. It's worth planning from the start.
What is the best tile for inside a shower niche? Accent tile that contrasts with the main wall tile — penny tile, zellige, or handmade ceramic — creates the most visual impact. Match it to one of the grout colors or accent colors in your overall bathroom palette.
Do shower niches get moldy? They can if the waterproofing is inadequate or if there's no drainage slope. Proper installation with a waterproof membrane (like Schluter Kerdi or RedGard) and a slight floor slope prevents this. Regular cleaning with a squeegee or weekly wipe-down helps too.
How do I visualize shower niche ideas before committing? Upload a photo of your existing shower or a bathroom inspiration image to a tool like StableRender to generate a photorealistic render showing how different niche placements, tile choices, and lighting would look — before a single tile is cut.